Basic shape operations
Vecta contains the most powerful tools to create shapes and diagrams easily, including smart shapes with formulas that is easy to use and improves your productivity.
Selecting a drawing tool

Selecting shapes and sub shapes
To select a shape:
- Click on any shape using the pointer tool
To select multiple shapes:
- Press the Shift or Ctrl key, then click on shapes using the pointer tool
To select shapes in groups:
- Click on a shape using the pointer tool
- Then click again on sub shapes
- Use the Shift or Ctrl key to select multiple sub shapes

To select shapes that is under another shape:
- Click on the shape on top using the pointer tool
- Click again at the same position
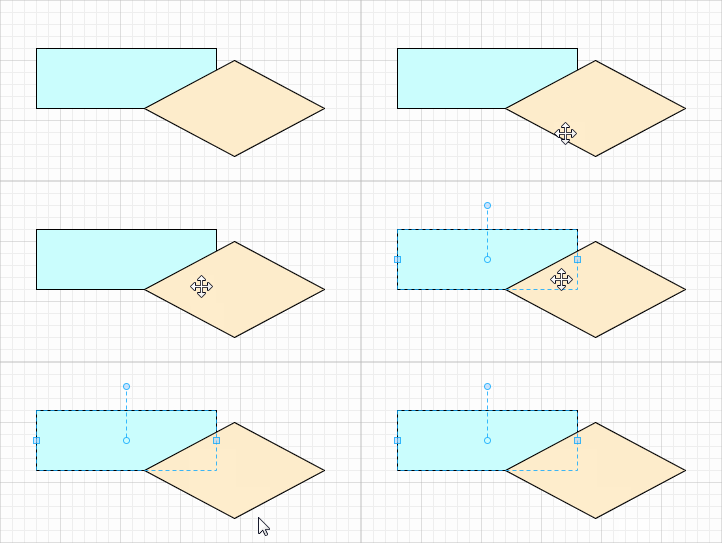
If there are multiple shapes under another shape, continue to click on the same position to cycle through all shapes.
Drawing squares, rectangles and rounded rectangles
To draw a rectangle:
- Select the rectangle tool, then click and drag on your drawing
To draw a square:
- Select the rectangle tool, press SHIFT key, then click and drag on your drawing.
To draw a rounded rectangle:
- Draw a rectangle, then click on the round corner tool, and select the required rounding.

Drawing lines, arcs, curves and freeforms (paths)
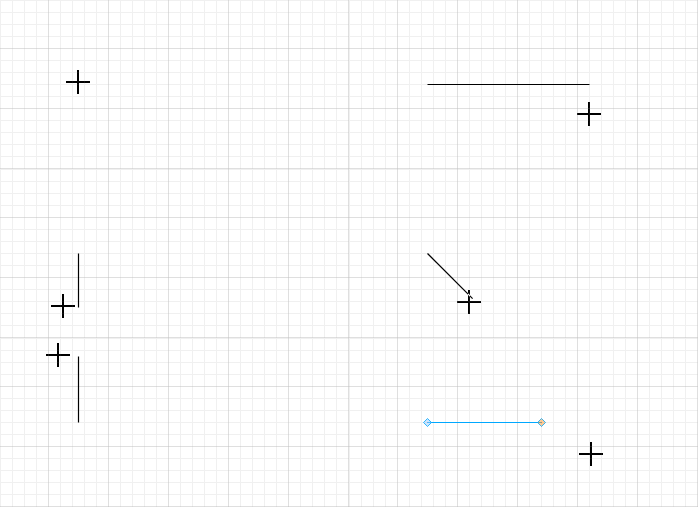
To draw a line, an arc, a curve or freeform:
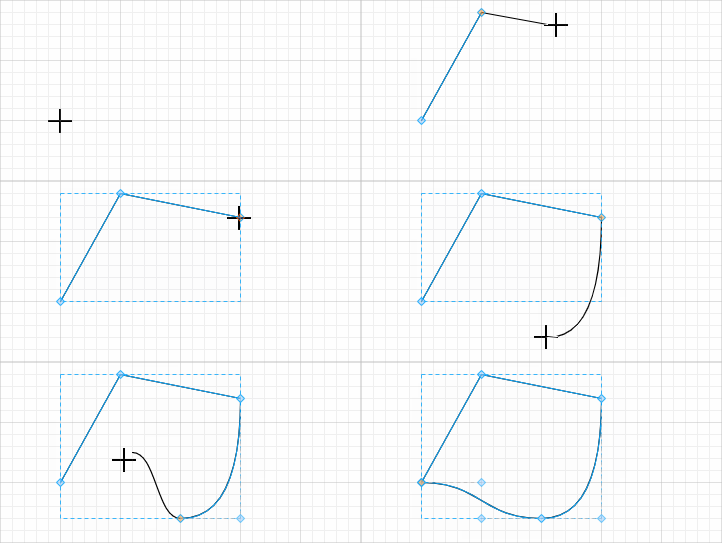
- Click on the path tool, then click and drag on your drawing

To draw a line while maintaining orientation at 0°, 90° or 45°
- Click on the path tool, press SHIFT key, then click and drag on your drawing.
Modifying paths
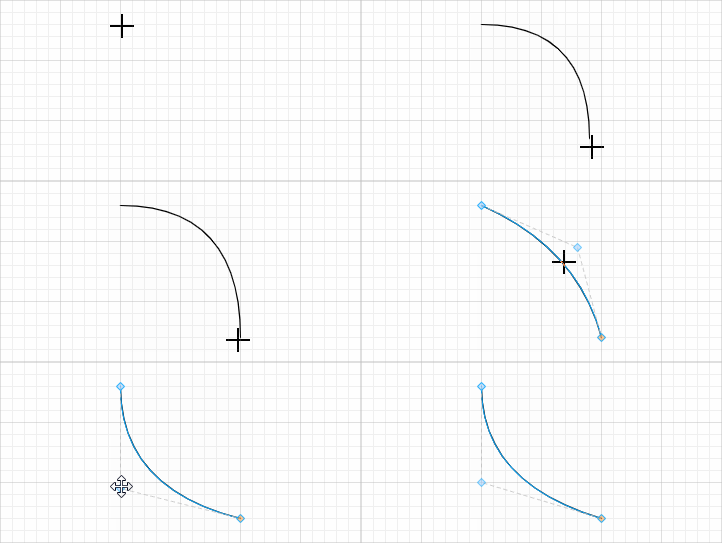
To modify paths, click on a path, click on any path tool, then click and drag on any path or control points.
Moving path points
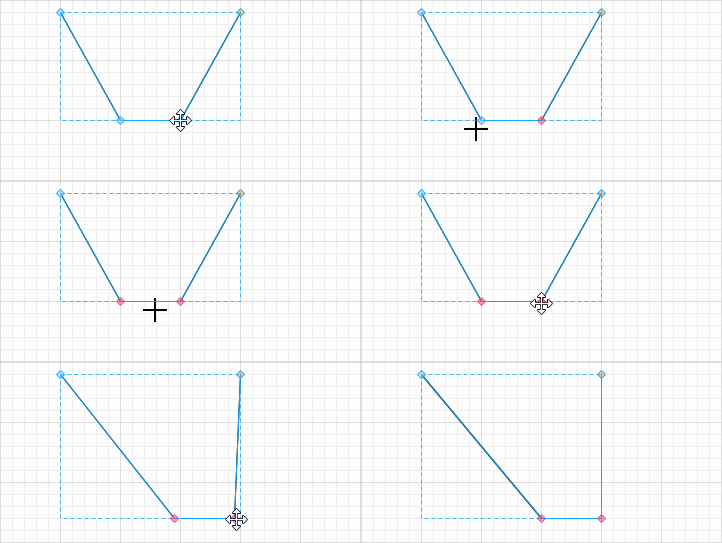
To select multiple path points, press the Shift or Ctrl key and click on multiple path points, then drag to modify.
Path points can also be moved using up, down, left and right keys.
Extending or joining paths
To extend or join paths, draw a path, then continue to draw from the begin or end points.
Adding path points
To add a path point, click on a path, then press the Alt key and click on the path.
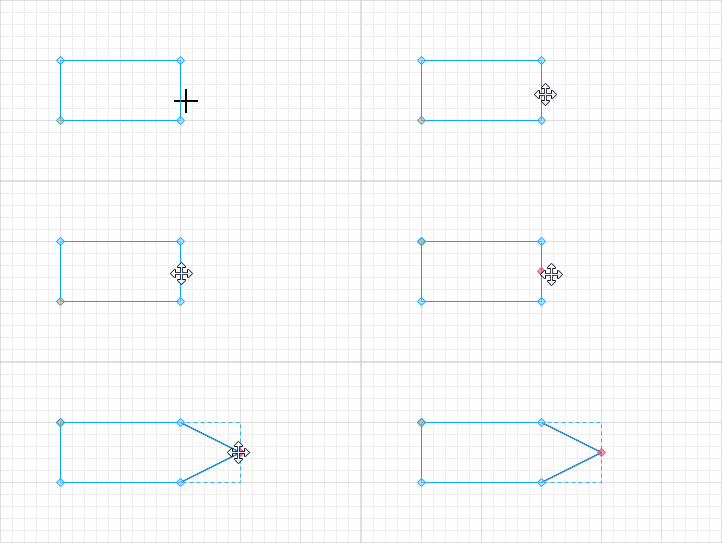
Once added, you can manipulate the path point just like any other path point.
Deleting path points
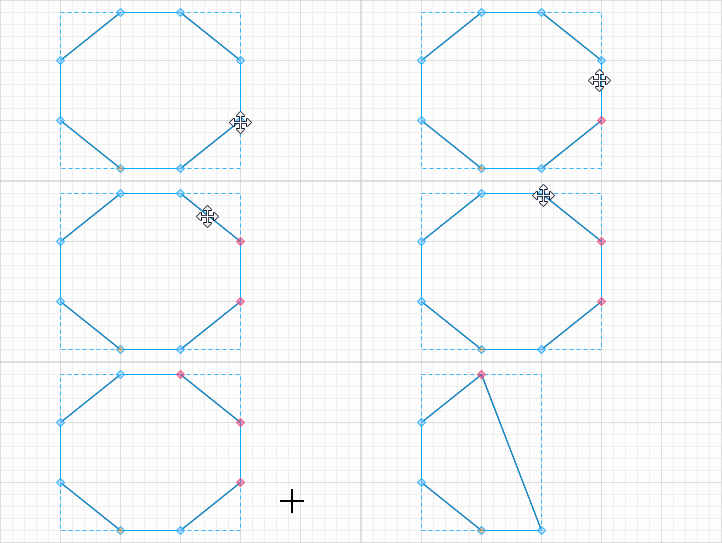
To delete path points, click on a path point or use the Shift key or Ctrl key to select multiple points, then press the Delete key.
Rotating shapes
To rotate shapes, click and drag on the rotate handle.

Resizing shapes
To resize a shape:
- Click on a shape using the pointer tool and drag on the blue handles.
To resize multiple shapes:
- Click on the pointer tool
- Press the Shift or Ctrl key, to select multiple shapes
- Then drag on the blue handles
Maintaining aspect ratio
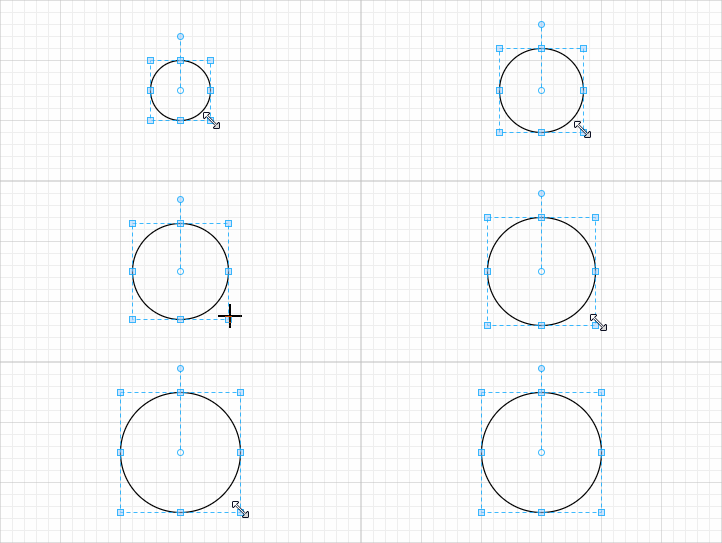
You can maintain a shape's aspect ratio during shape creation or resizing, by pressing on the Shift key.
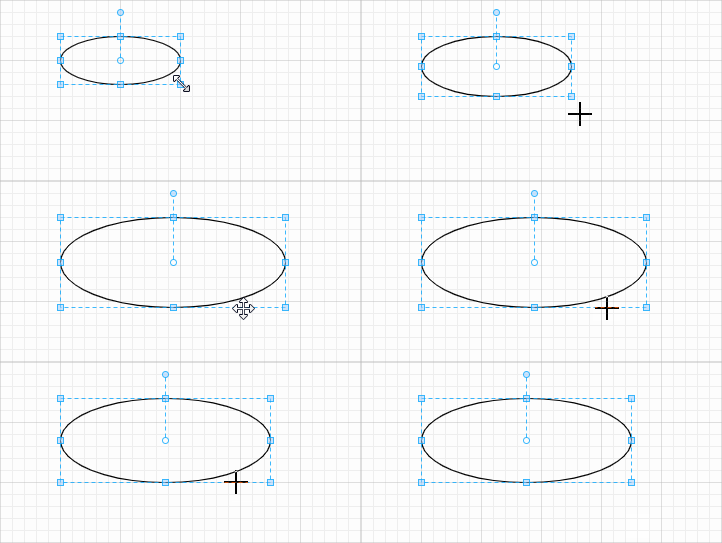
Watch the video below to learn more about maintaining a shape's proportion.
How to Resize Shapes Proportionally and Use Offset
Resizing shapes from the center
To resize a shape or multiple shapes from the center:
- Select the shapes you wanted to resize using the pointer tool
- Press Alt key and drag on the blue handles
Alternatively, you can also press both Alt and Shift key to resize from the center and maintain proportions.
Resizing with proportional stroke or line weight
In some cases, you may want to resize the stroke or line weight to maintain proportions, as you resize multiple shapes:
To resize with stroke or line weight:
- Click on the shapes you want to resize using the pointer tool
- Press both the Ctrl and Shift key and drag on the blue handles

Setting stroke widths or line weight

To set line weight:
- Select shapes you wanted to modify
- Click on the line weight icon, and select a line weight

Setting text stroke width
To set text stroke width:
- Click text block tool icon

- Select text you want to modify
- Click on the line weight icon, and select a text stroke width
Setting line style
To set line style:
- Select shapes you wanted to modify
- Click on the line style icon, and select a line style

Understanding line style format
Line styles formats follow svg dasharray formats, where we specify dashes and gaps, separated by white space or commas.
If an odd number of values is provided, then the list of values is repeated to yield an even number of values as shown below:

Line styles are also affected by stroke linecap:
See also
Setting line end (arrow)

Vecta provides an extensive set of line ends which you can use to style non closed paths.
To set line ends:
- Click on a non closed path or select multiple paths
- Click on begin arrows and/or end arrows
- Once completed, click on anywhere on your drawing to close the line end menu

Setting line end (arrow) sizing
To set line end sizing:
- Click on a non closed path or select multiple paths
- Click on begin arrow size and/or end arrow size
- Once completed, click on anywhere on your drawing to close the line end menu

Modifying stroke linecap
To set stroke linecap:
- Click on a non closed path or select multiple paths
- Click on a linecap
- Once completed, click on anywhere on your drawing to close the line end menu

Setting stroke linejoin
To set stroke linejoin:
- Click on a non closed path or select multiple paths
- Click on a linejoin
- Once completed, click on anywhere on your drawing to close the line end menu

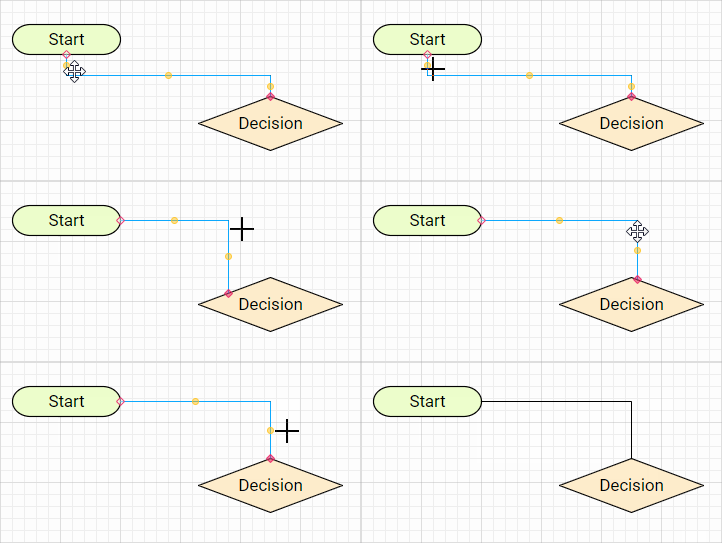
Using connectors

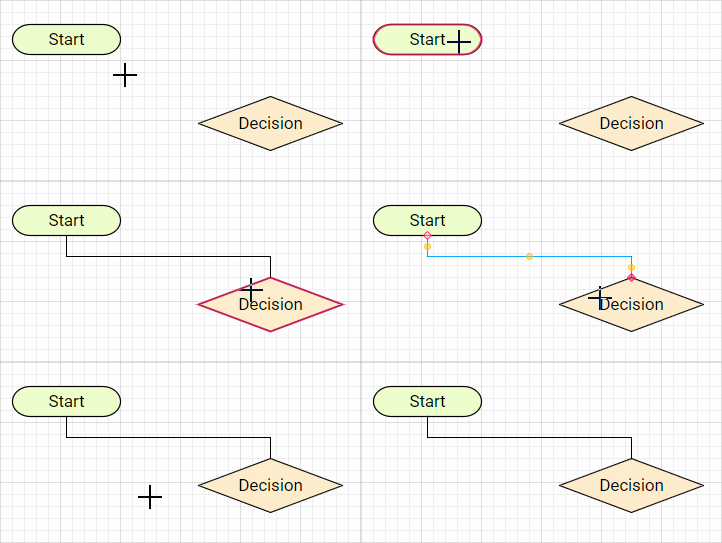
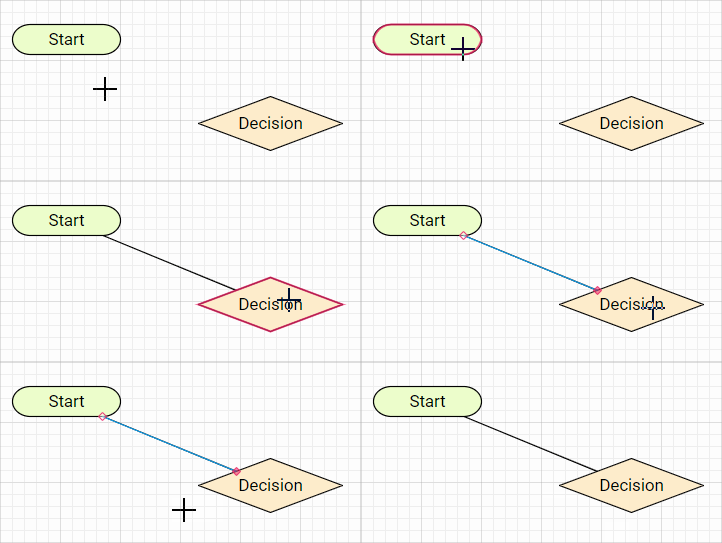
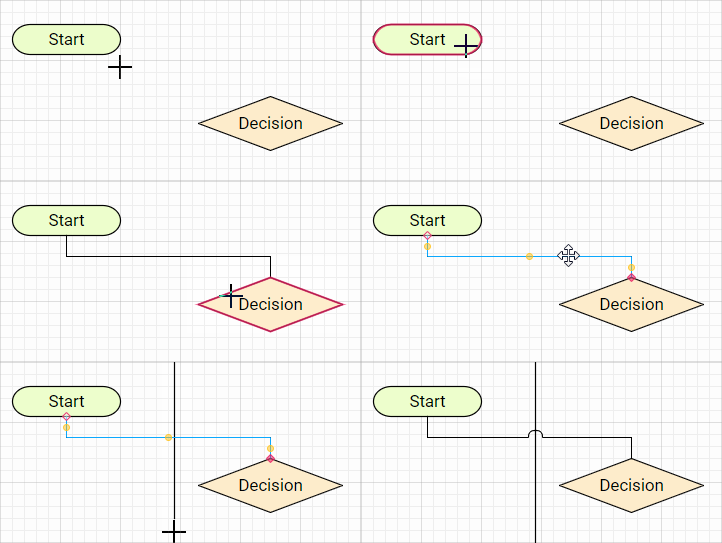
To connect shapes together using connectors:
- Click on the connector tool
- Click and drag from a shape to another
Using elbow connectors
Using straight connectors
Using jump connectors
Resizing connectors
Using connection points
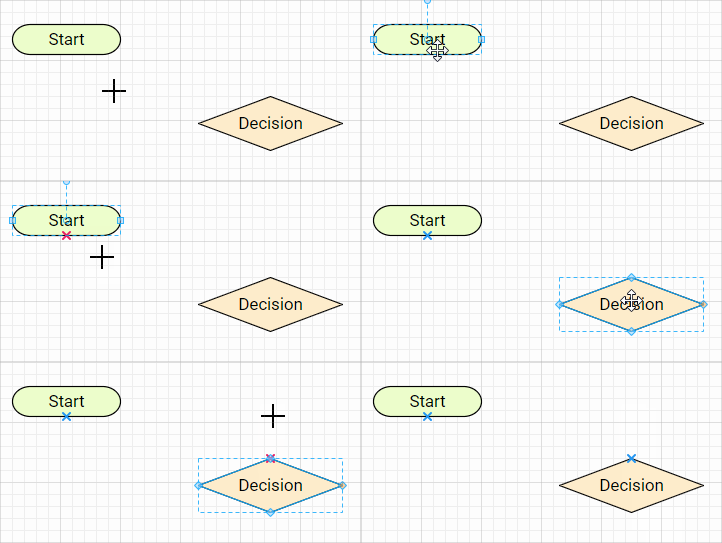
Connection points are used to specify where a connector should connect.
Adding connection points
To add a connection points to a shape:
- Click on the connection point tool
- Click and select a shape
- Press Ctrl key and click on where you want to place the connection point
Deleting connection points
To delete a connection point:
- Click on the connection point tool
- Click on a shape
- Click on the connection point you want to delete
- Press Delete key
Moving connection points
To move a connection point:
- Click on the connection point tool
- Click on a shape and then on a connection point
- Drag the connection point to the new location
Connecting shapes using connection points
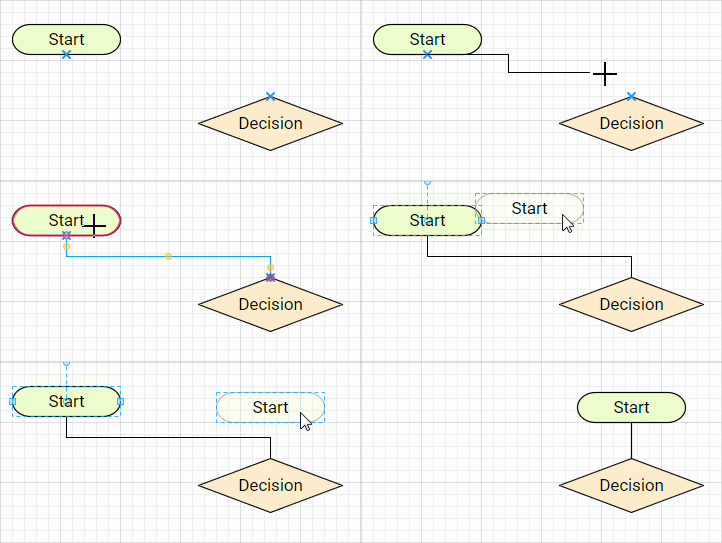
Watch the video below to learn more about connectors.
How to Connect Shapes Accurately (Connectors vs Lines)
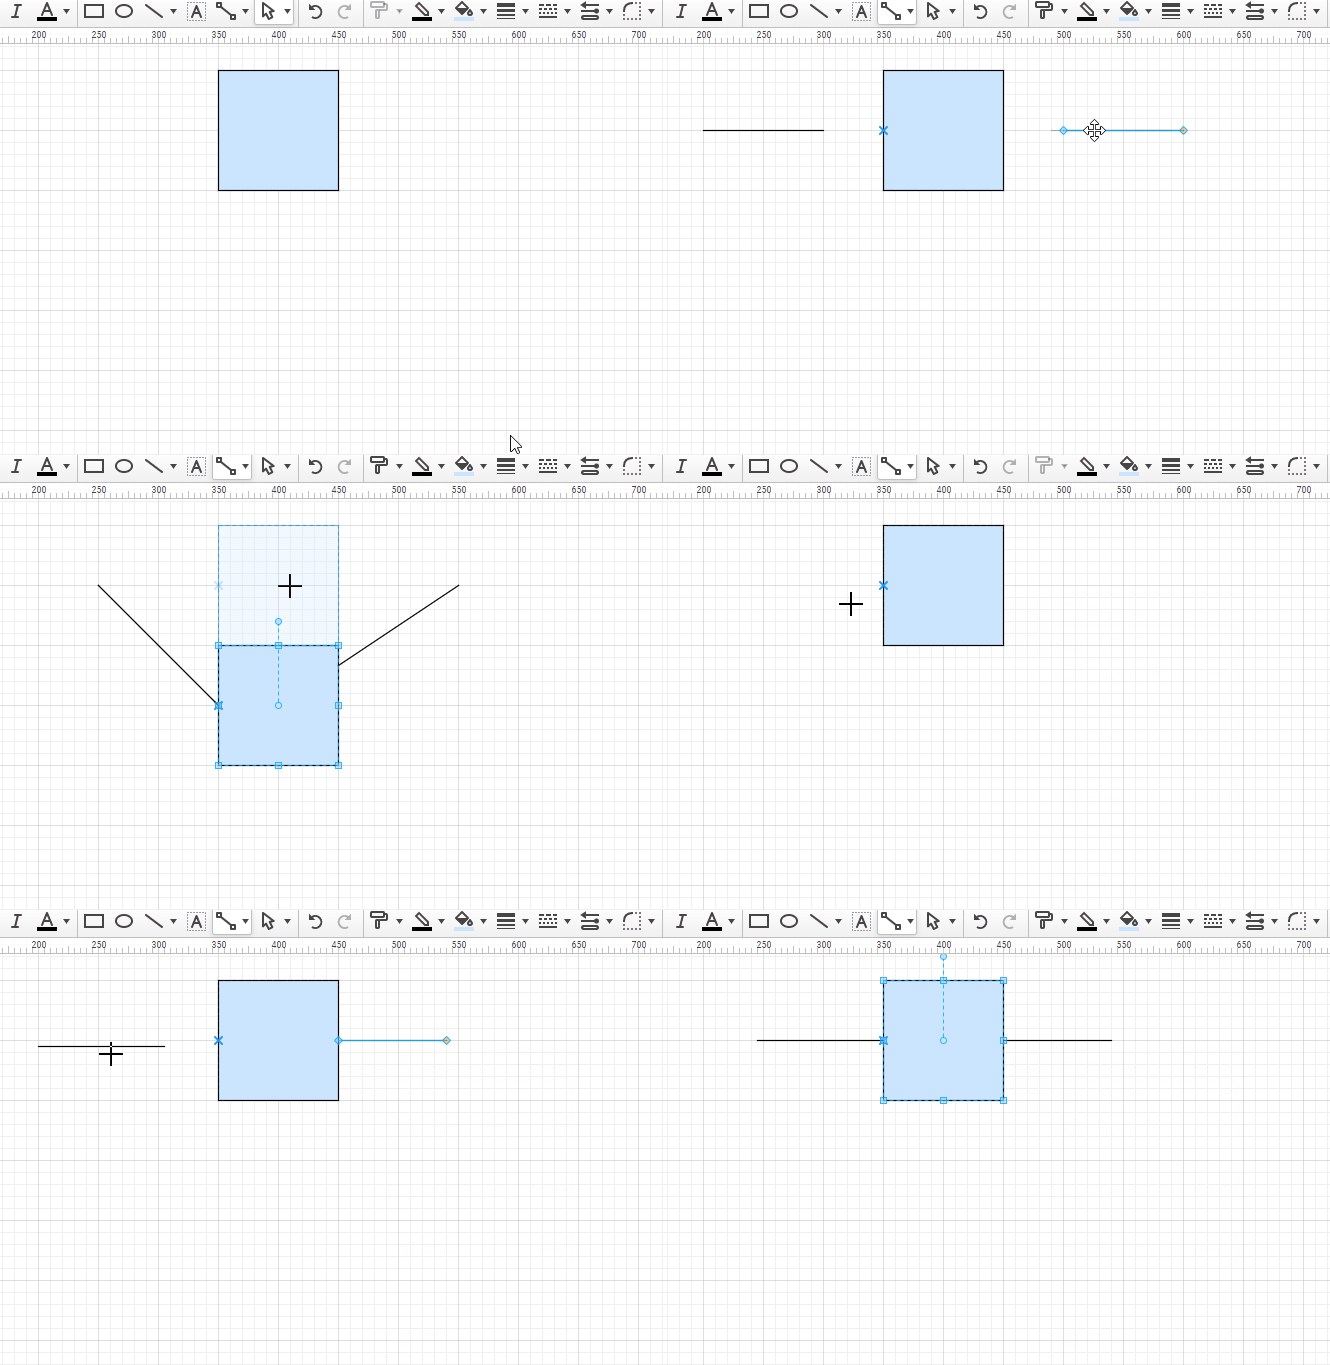
Changing connection mode of a shape
Shapes can be connected with or without setting the connection points. This function is useful when you only need certain shapes to be able to connect with the connection points.
To set the shape to connect with connection points only:
- Click and select shapes
- Right click and select Tools | Connect to connection points only.
To set the shape to connect with or without connection points:
- Click and select shapes
- Right click and select Tools | Connect to shape.
Locking shapes

To lock a shape:
- Click and select shapes
- Right click and select Tools | Lock Shape(s).
Moving, grouping/ungrouping, deleting and resizing operations are not allowed on locked shapes.
To unlock a shape:
- Right click on locked shape
- Click on Unlock shape(s).
Adding hyperlinks
Users may choose to add hyperlink to direct to websites or different pages within the drawing.

To add a hyperlink to a shape:
- Right click on a shape, select Hyperlink | Insert hyperlink
- Select URL to direct to website
- Select Page to direct to different pages. Eg. Page 1, Page 2
- Insert descriptions to identify each hyperlinks
To set a hyperlink to open in current tab or new tab:
- Select Current tab or New tab according to your preferences
To edit or delete a hyperlink:
- Right click on a shape, select Hyperlink | Edit hyperlink
To jump to a hyperlink:
- If in edit mode, right click on a shape, select Hyperlink | Your hyperlink
- If in view or publish mode, simply click on the shape