Modifying fonts and text

In Vecta, all shapes can have text, including sub shapes in a group. To enter text for a shape, simply select the text and type away.
Setting font family
To set font family:
- Select shapes with pointer tool
- Click on Font family icon, and select a font

Adding your own web and custom fonts
Vecta provides a list of available fonts to be used in your drawings. In addition, you can also add your own fonts through the Custom font dialog. At the moment, only Google Fonts are allowed, and we are working to add more web fonts.
Whereas, to add your own custom fonts and use it within Vecta, clicking on Upload fonts opens up a dialog where you could upload your own fonts.
Your custom fonts permission inherits the drawing permission. For example, if a custom font is uploaded on a personal drawing at Home, the font is only accessible by you as it is a personal font.
If a custom font is uploaded on a Team drawing, the font is a team font and is shared among the team.
Currently only woff and ttf font formats are supported and we are working to support more font formats.
To add your own custom fonts, you can also drag and drop a font file onto your editor.

Setting font sizes
To set font sizes:
- Select shapes with pointer tool
- Click on Font size icon and select or type in a font size
Alternatively, you can use the keyboard and press on:
- Ctrl + Shift + . to increase the font size
- Ctrl + Shift + , to decrease the font size
Both pt and px units are allowed for font sizing.
Setting text alignment
To set text alignment:
- Select shapes with pointer tool
- Click on Text alignment icon and select your required alignment

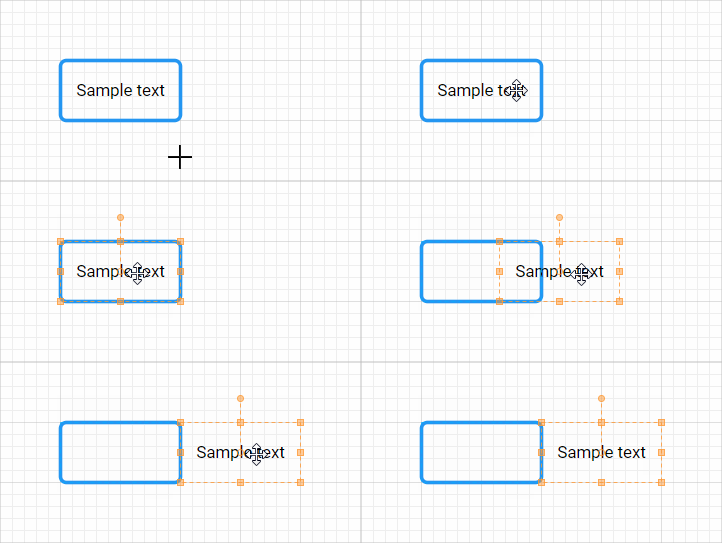
Positioning text
To position text:
- Click on a shape, then on the text block tool
- Drag the text block to any require position
Modifying text padding
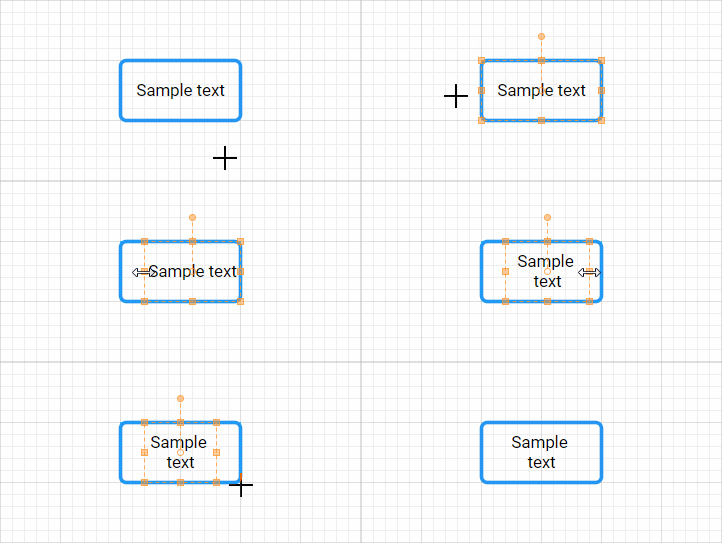
To modify text padding:
- Click on a shape, then on the text block tool
- Drag and resize the text block
Creating text
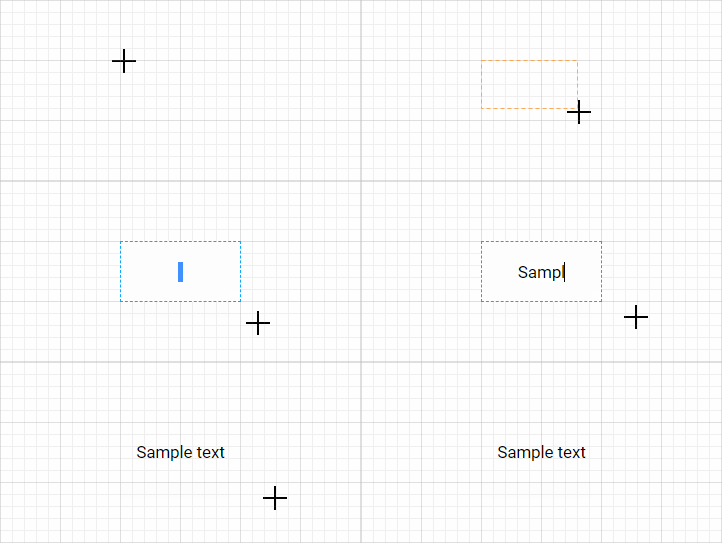
To create text:
- Click and drag on the text block tool, then type away
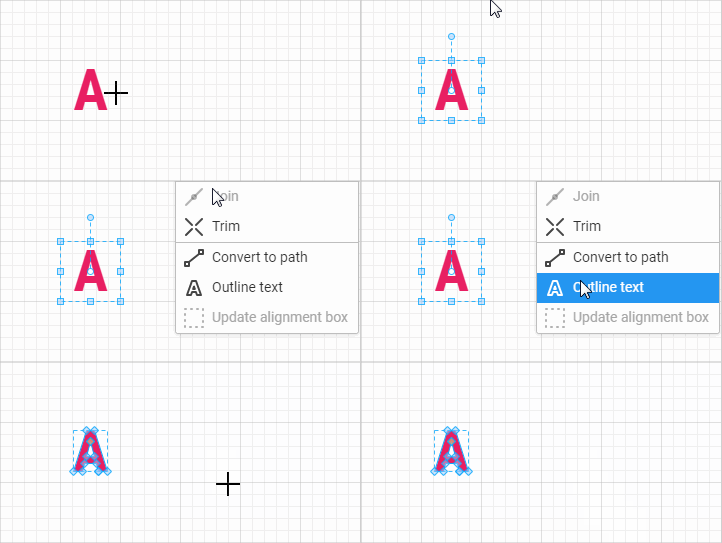
Outlining text
To outline text:
- Create text and style accordingly
- Right click, select Operations | Outline text
Setting rounded background on text
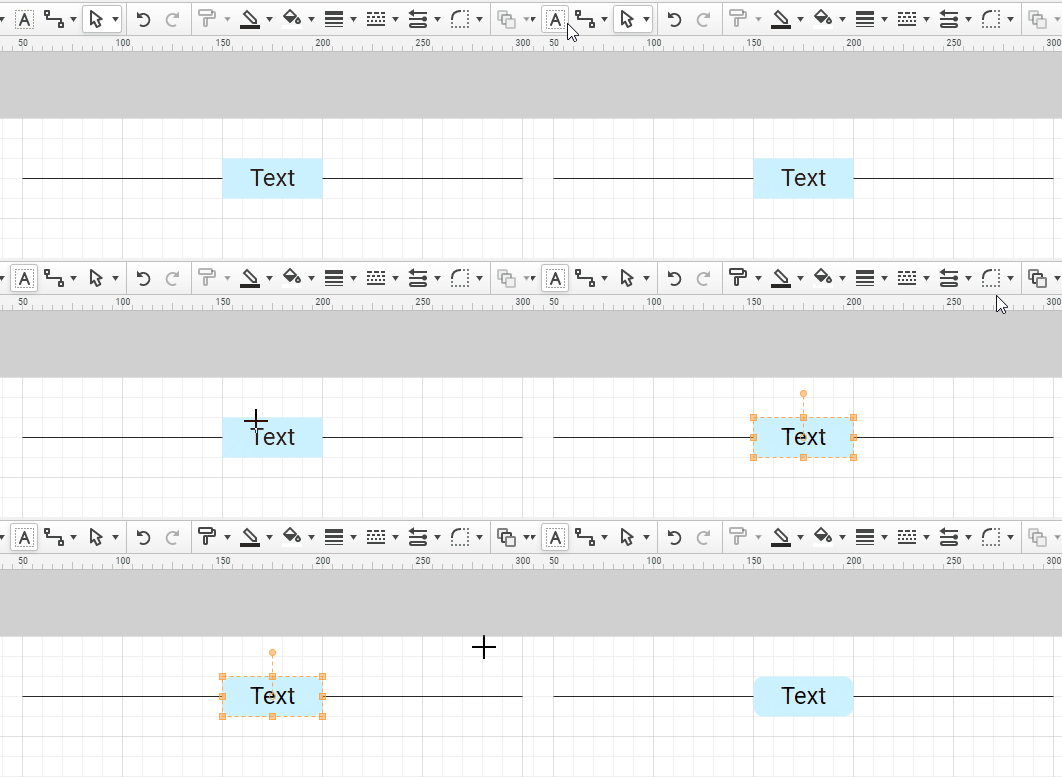
To set rounded background on text:
- Click on text block tool, then click on a text with background color.
- Click on the round corner tool, and select the size of the rounded corners.
See also
Find and replace text
To find text:
- Press Ctrl + F (or Cmd + F on Mac), type in your keyword and press Enter key.
- Continue pressing Enter key will show you the next matched keyword.
To replace text:
- Key in your keyword and press Enter key to search.
- When the keyword highlighted, you can type into the "Replace with" field.
- Click on the Replace button to replace it.
- You may use the Replace all button to replace all keywords.

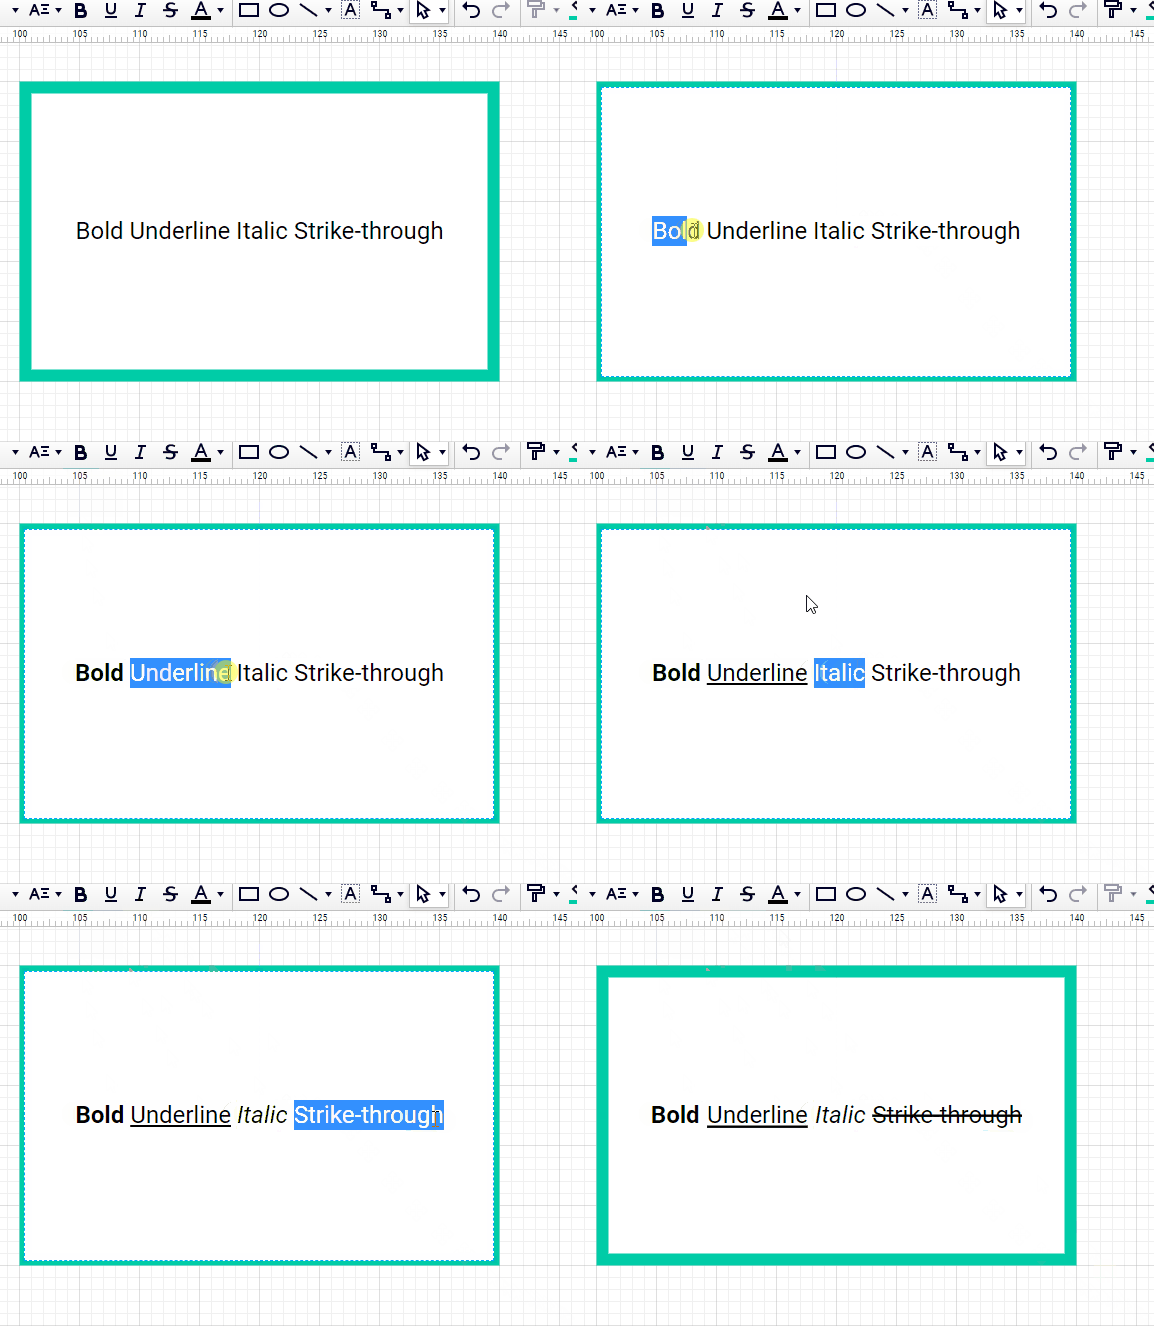
Setting rich text styling on text
To set rich text styling on text:
- Click on a shape, then press F2 key to enter the text editor.
- Select some texts.
- Apply the text styling on the selected text.
